7 Checks for Choosing an Emergency HVAC Company
August 12, 2026
Whole Home Humidifier Review for Smarter Choices
August 14, 2026
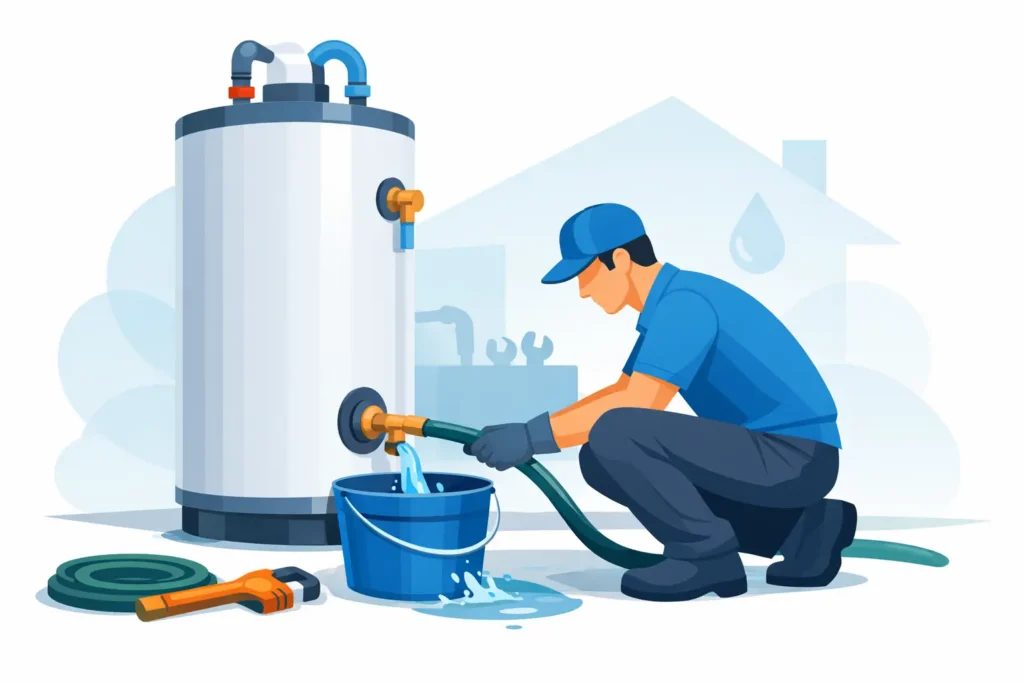
A water heater can keep working while sediment quietly collects at the bottom of the tank. That buildup can reduce efficiency, cause popping or rumbling sounds, and shorten the equipment’s service life. Learning how to drain water heater equipment safely gives homeowners a practical way to support reliable hot water between professional maintenance visits.
Draining a tank is usually manageable, but it is not a job to rush. Water can be hot enough to burn, older drain valves can leak, and a tank that has not been maintained for years may reveal an existing problem when sediment begins to move. If you see corrosion, active leaking, or discolored water that does not clear, stop and arrange water heater repair or replacement service.
Why Draining a Water Heater Helps
Most tank-style water heaters collect minerals that settle out of the water supply. Northern Virginia homes can have mineral content that leaves sediment behind over time, particularly in areas with harder water. The sediment gathers at the tank bottom, where the burner or lower electric heating element does much of its work.
A thin layer may not create an immediate issue. A heavy layer makes the system work harder to heat water through the buildup. You may notice longer recovery times, uneven water temperature, higher energy use, or a crackling, knocking, or popping noise while the unit heats.
Draining the tank helps remove loose sediment. It does not reverse rust, repair a failing heating element, or make an aging tank new again. Think of it as preventive care, not a cure for every water heater issue.
When to Drain Your Water Heater
For many homes, draining and flushing the tank once a year is a reasonable starting point. A household with very hard water, high hot-water demand, or a unit that makes sediment-related noises may benefit from more frequent service. Your manufacturer’s instructions should always take priority, since drain and maintenance requirements can vary.
If the heater is very old and has never been flushed, use extra caution. Opening the drain valve can sometimes disturb mineral deposits that were masking a weak valve or corroded tank connection. A professional inspection is the safer choice if the unit is near the end of its expected life, has visible rust, or has a history of leaks.
What You Need Before You Start
Have a standard garden hose long enough to reach a safe drainage location, such as an exterior area or suitable floor drain. You may also want a flat-head screwdriver if your drain valve has a slotted handle, a bucket for checking the water, and gloves for handling the hose connection.
Choose your drainage point carefully. The water may be hot and may carry sediment that can stain surfaces. Never send hot water onto a lawn, near delicate landscaping, or into an area where it can cause injury or water damage. Keep children and pets away from the work area until the tank is refilled and operating normally.
How to Drain Water Heater Tanks Step by Step
1. Turn Off the Energy Source
For an electric water heater, switch off the correct breaker at the electrical panel. Do not skip this step. An electric unit can burn out a heating element if power is restored before the tank is completely full.
For a gas water heater, turn the gas control to the vacation or pilot setting according to the manufacturer’s instructions. If you are unsure how your particular control works, do not force it. Call for help rather than risk improper operation.
2. Let the Water Cool
Turn off the cold-water supply valve at the top of the tank. Then open a hot-water faucet somewhere in the home to relieve pressure and allow air into the system. Give the water time to cool before connecting the hose and opening the drain valve.
Waiting several hours is the safest approach. If you need to work sooner, open the hot-water faucet and run it until the water is noticeably cooler, but remember that water inside the tank can still be hot. Treat every connection and discharge point carefully.
3. Connect the Hose and Position It Securely
Attach the garden hose to the water heater drain valve near the bottom of the tank. Hand-tighten it firmly enough to prevent leaks, then route the other end to your selected drainage point. Avoid sharp bends or kinks that can slow the flow.
Before opening the valve, check that the hose will stay in place. A loose hose can release hot, sediment-filled water onto a floor in seconds. If you are draining into a bucket, work in small batches and allow the water to cool first.
4. Open the Drain Valve Slowly
Open the water heater drain valve slowly. Water may begin flowing right away, or it may only trickle if the hot-water faucet is closed or a vacuum forms inside the tank. Make sure the hot-water faucet remains open.
At first, collect a small amount of water in a clear container if possible. Clear water indicates that there may be little sediment to remove. Cloudy water, grit, or a brownish tint can point to mineral buildup or internal corrosion. Some sediment is normal; persistent rusty water deserves professional attention.
5. Flush Until the Water Runs Clear
Let the tank drain. To flush more sediment, briefly reopen the cold-water supply while the drain valve remains open. The incoming water stirs loose material near the bottom and carries it through the hose. Repeat this gentle flush until the discharged water looks mostly clear.
Do not leave the process unattended. If the flow suddenly stops, the drain valve or hose may be clogged with sediment. Close the valve before disconnecting anything. Poking inside the valve can damage it or create a leak, so a stubborn blockage is a good reason to call a water heater professional.
6. Refill the Tank Completely
Close the drain valve tightly, disconnect the hose, and turn the cold-water supply back on. Keep the hot-water faucet open while the tank refills. At first, air will sputter from the faucet. Once water flows in a steady stream with no bursts of air, close the faucet.
Inspect the drain valve and nearby connections for drips. Then, and only then, restore power to an electric water heater or return a gas unit to its normal operating setting. Check for hot water after the unit has had time to recover.
Problems That Mean You Should Stop
A routine drain should not require force, improvisation, or repeated attempts to stop a leak. Stop the job and request service if the drain valve will not close, water appears around the base of the tank, the pressure relief valve releases water, or the tank produces heavily rust-colored water.
Pay attention to odor as well. A sulfur or rotten-egg smell can be associated with water chemistry or an issue inside the tank. Flushing may reduce the odor temporarily, but it may not address the cause. The right repair depends on the water heater type, condition, and source of the problem.
A Few Mistakes to Avoid
Do not turn an electric water heater back on before it is full. Do not drain scalding water into an unsafe area. Do not cap, plug, or alter the temperature and pressure relief valve. And do not assume a leak is normal simply because it appeared during maintenance.
It also helps to avoid draining a neglected, aging tank just before a major event or a busy workweek. If the unit is already showing warning signs, schedule an inspection when you have time to address a repair or replacement decision if needed.
A clear, quiet water heater is easier to rely on when your home needs it most. If draining your unit exposes a leak, failing valve, recurring noise, or unreliable hot water, AAA HVAC can help you determine the next practical step and get your hot water system back on dependable footing.